Testing Syllabus
TTA Ho Sin Sul Requirements
Self-defense testing requirements, general principles, falls, joint attacks and throws
Shared TTA reference pages: Testing Notes · Step Sparring · Ho Sin Sul (this page) · Back to Belt Requirements
Ho Sin Sul is the self-defense portion of every TTA testing from Low Yellow onward. The requirements and principles below are reproduced from the TTA Ho Sin Sul Instructor’s Guide (October 2023). Specific release, counter and throwing techniques are taught in class by your instructor.
On this page:
Color Belt Requirements ·
1st Dan Black Belt ·
Terms and Testing Rules ·
General Self-Defense ·
Neutral Fighting Stance and Vertical Punches ·
Falls ·
Joint Attacks ·
Throws
Basic TTA Ho Sin Sul Testing Requirements – Color Belts
Each row is the requirement for the belt you are testing for. The last column links to that belt’s own requirements page, where the Ho Sin Sul requirement is listed under Techniques.
| Level |
Testing for |
Requirement |
Belt page |
| White |
Yellow |
1-2 Punch with twist – vertical punches thrown in sequence rotating on the front foot and then the rear foot.
Side block with inner or outer forearm, then two series of 1-2 vertical punches demonstrating power with twisting motion.
|
8th Gup – Low Yellow |
| Yellow |
High Yellow |
Release from a double lapel grab followed by two series of 1-2 vertical punches demonstrating power with twisting motion. |
7th Gup – High Yellow |
| High Yellow |
Green |
Release from a choke from the front. |
6th Gup – Low Green |
| Green |
High Green |
Release from a choke from the front followed by a counter. |
5th Gup – High Green |
| High Green |
Blue |
Release from grab or open one arm choke from the rear. |
4th Gup – Low Blue |
| Blue |
High Blue |
Release from a grab or open one arm choke from the rear followed by counter with joint attack. |
3rd Gup – High Blue |
| High Blue |
Red |
Fall to the front, fall to the back, fall to the side, demonstrate a hip throw and joint attacks. |
2nd Gup – Low Red |
| Red |
High Red |
Release from an attack followed by a throw. |
1st Gup – High Red |
1st Dan Black Belt
Time limit – Two minutes
To earn their black belts the defender must be able to perform a Ho Sin Sul approved by their instructor with realism. Ki-aps are required. No talking or hand signals are allowed between the participants. Proper etiquette is also required. Ho Sin Sul partners should not be fellow testers or senior ranks unless permission has been granted by the testing board. Male participants may not use a female as their demonstration partner without prior approval.
Requirements:
Two separate sets of three different Ho Sin Sul techniques each in succession followed by one set of four of the learned Ho Sin Sul techniques. No duplicates – Black Belt candidate must successfully demonstrate ten different Ho Sin Sul techniques.
See the 1st Dan – Black Belt page for the full black belt requirements.
Terms and Testing Rules
From the TTA Testing Requirements Notes. Grab terms (single, double, straight and cross grab) are listed with the full Ho Sin Sul Terms on the Testing Notes page.
- Double Lapel grab - Grab where the attacker uses both hands to grab the opponent’s (defender’s) uniform.
- Choke from front or rear - Choke where the attacker grabs the opponent’s throat with one or two hands while standing in front of opponent or a choke where the attacker grabs opponent’s throat with one or two hands while standing behind the opponent.
- Counter or Counterattack – a punch, strike or kick that follows a successful release or defense against an attack.
- Joint attack – a counterattack where the opponent takes control of attacker by grabbing and applying pressure on one or more of the attacker’s joints. Example joints would be the fingers, wrists or elbow.
- Release – defender’s escape from a choke, grab or other control technique used by attacker.
- Throw – typically a hip throw where defender has captured attacker’s punch, strike or kick and uses a hip throw to take attacker to the ground.
- Takedown – defender takes control and trips or uses control to force attacker to ground
General Ho Sin Sul Notes for Color Belt and Black Belt Testings
- Verbal communication during Ho Sin Sul is prohibited.
- The purpose of Ho Sin Sul is to use kicks, punches, throws, takedowns, and pressure points to control, disarm, and incapacitate your opponent.
- No unnecessary attacks should be made to a fallen opponent.
General Self-Defense
It is important to note that the best defenses are always to be aware of the situation and avoid bad situations. Defender should try to run away and avoid a fight whenever possible. Defenses should only occur if the defender does not have any options to avoid or escape a fight. Defender should always be looking for and aware of any additional potential attackers at all times.
A few generalities to consider:
- As a general rule, focus on counterattacking against the attacker’s vision, their breathing or their balance. If they cannot see, breathe or control their body, their attack is generally over.
- If the situation warrants a controlled response to an attack such as a grab or push from the attacker, joint attacks and control moves can be more appropriate than an all out counterattack.
- Remember to use elbows, knees and legs and not just hands and fists when counterattacking in a more serious attack. A knee strike to the attacker’s leg that is on the same side as the defender’s knee being used is a safer move than [sentence incomplete in the source document]
- In most cases when attacked, a block or dodge followed by a counterattack to the attacker’s eyes and face will give the defender an edge. Most people quit an attack, at least temporarily, when their eyes are in danger so counterattack the eyes.
- The nose is very sensitive so a punch, palm strike or head butt to the nose can be very effective. A word of caution though – the forehead, cheeks, side of the head, back of the head, etc., are very solid pieces of bone and it is quite possible a strike with a fist to those parts of the head, although painful to the attacker, could very easily hurt or even break bones in a hand. Caution is advised.
- A counterattack to the solar plexus can be very effective. If the attacker cannot breathe, they generally cannot continue an attack.
- “Where the head goes so goes the body”. A counterattack under the chin pushing the attacker’s head up and back will cause their body to go up and backwards as well.
- Generally, try not to go to the ground when the defender throws the attacker to the ground. There are exceptions, especially if the attacker has a gun, but generally, once the defender has the attacker to the ground the best action is to run and create distance and separation.
- Yelling and making loud noises will often get attention from others. Most attackers do not want attention so it is beneficial to create as much noise as possible.
Neutral Fighting Stance and Vertical Punches
Neutral Fighting Stance
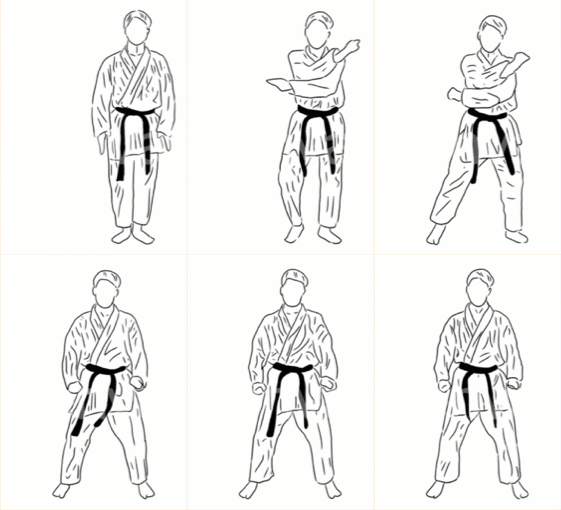
When a possible confrontation seems to be potentially developing or imminent it is important not to escalate a situation that could otherwise be managed civilly. To protect themselves while remaining in a relatively passive position and not openly advertising the defender is ready, the defender should step slightly backward into a neutral fighting stance. This is a stance with the back foot slightly back (maybe 12” to half a step) and on ball of the rear foot. This stance is full facing toward the potential attacker with the defender’s hands up in an open position with the palms facing toward the attacker. It is important to remain facing directly toward the attacker and not bladed into a more traditional fighting stance and to have the hands open and not in fists.
Vertical Punches
Vertical punches are punches with the fore-finger and thumb on top and the pinky at the bottom toward the ground. They protect the bones in the hand more than a normal type of punch.
The defender should ‘twist’ or rotate their body slightly as they throw the punch to add power. When throwing a punch, the defender rotates on both balls of the feet causing the knees to twist in the opposite side of the defender’s body than the hand they are punching with. For example, when throwing a punch with the lead hand, the defender twists/rotates their body to face more toward the side that is not punching. Their chest will end up facing diagonally to the attacker at the point of impact. The punching arm is immediately pulled back after making contact and the defender’s body returns to the neutral stance.
Falls
- Forward roll – tuck chin, throw arm downward and under (behind the defender) and roll on top of shoulder and neck. Come up on feet.
- Front fall – convert to a side fall if possible, if not, spread arms outward and slap the ground hard just before landing on it. DO NOT REACH DIRECTLY IN FRONT.
- Side fall – lift lower arm high overhead and slap ground hard with lower arm just before landing on it.
- Backward fall – tuck chin into chest and slap ground behind defender just before landing on it.
- Defensive position on the ground – stay on back while facing the attacker. Keep legs up in the air between the defender and the attacker. Defender’s hands should be on the ground to facilitate rotating or moving as necessary should the attacker change the direction of the attack.
Joint Attacks
- Fingers – the defender grabs the attacker’s fingers with their hand and pulls, twists, or moves the attacker’s finger(s) backwards or sideways against the normal movement of the knuckle joint.
- Wrist – the defender grabs the attacker’s hand and forcefully pushes or pulls the hand either backwards toward the wrist or downward toward the attacker’s palm.
- Elbow – the defender captures the attacker’s forearm with one hand while placing their other hand or forearm on the triceps on the back of the attacker’s arm above their elbow then pulls the attacker’s forearm backward against the normal movement of the attacker’s elbow.
- Knee – using their foot, knee or hand/arm, the defender presses inward or outward toward the side of the attacker’s knee or directly backward against the normal motion of the knee. This motion will require a lot of pressure so it is best done with the foot or knee when possible.
Throws
- Hip throw – the defender captures the attacker by the arm, clothing, the neck or across the back under the attacker’s arm then quickly steps forward with their outside leg placing it on opposite side of the attacker and close to the attacker’s leg so that the defender is positioned hip-to-hip. The defender pushes their hip into and upward on the attacker’s hip lifting the attacker up slightly then the defender rotates their body away from the attacker throwing them by using their hip as a fulcrum point and their leg as a tripping point on the attacker.
- Throw from a lapel grab or choke – the defender will quickly drop downward and roll backward while pulling the attacker off balance and over them. The defender continues the motion until defender rolls on top of the attacker and then performs counterattacks with their fists, elbows, etc.
- Sweep – This only works when the attacker has their weight on their lead leg. The defender uses their lead leg to “kick” the attacker’s foot or ankle to the side in an inward direction so the attacker’s leg moves across their body. Choose the direction of the sweep carefully as this will not work in an outward motion on the attacker’s body.
Specific release, counter and throwing techniques are taught in class by your instructor.
Reproduced from the Traditional TaeKwon-Do Alliance testing documents (revised 2023). © Traditional TaeKwon-Do Alliance, LLC. All rights reserved.